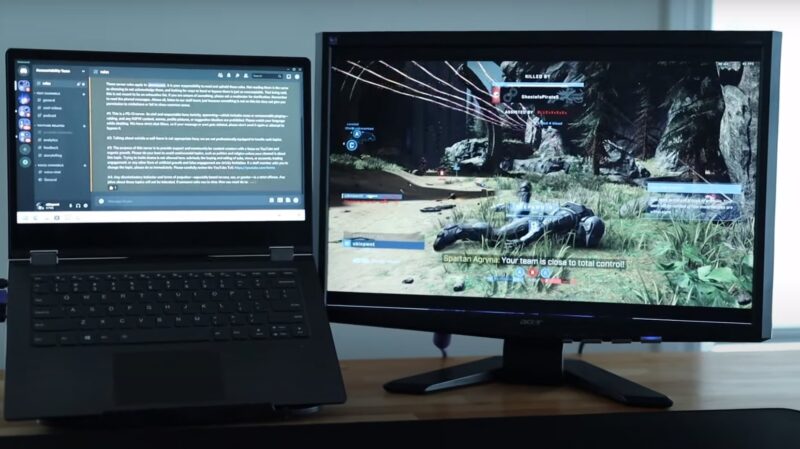
Connecting a laptop to a monitor with an HDMI cable is a convenient way to expand your visual workspace, enhance your gaming experience, or improve your productivity with a dual-screen setup. The process is straightforward and can be completed in just a few simple steps.
Prepare the Devices
Setting up a connection between your laptop and a monitor using HDMI requires some preliminary steps. These steps are crucial to ensure a smooth and successful connection. Let’s walk through what you need to do before making the connection.
Check the Compatibility
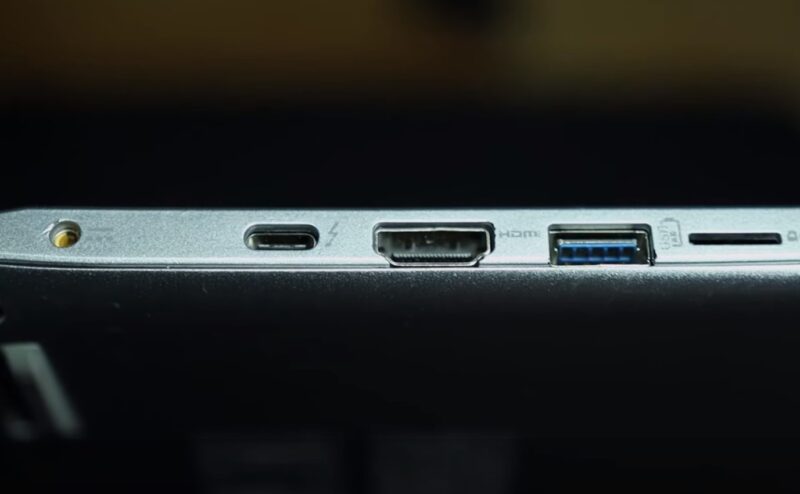
The first step in your preparation is to check the compatibility of your devices. This means ensuring that both your laptop and your monitor are equipped with HDMI ports.
The HDMI port is a standard interface in most modern electronic devices and is used for transmitting high-definition video and audio. If your laptop doesn’t have an HDMI port, it’s not the end of the road.
You can still establish a connection using an adapter. For instance, if your laptop has a USB-C or a Mini DisplayPort, you can use a USB-C to HDMI or a Mini DisplayPort to HDMI adapter, respectively.
Choose the Appropriate HDMI
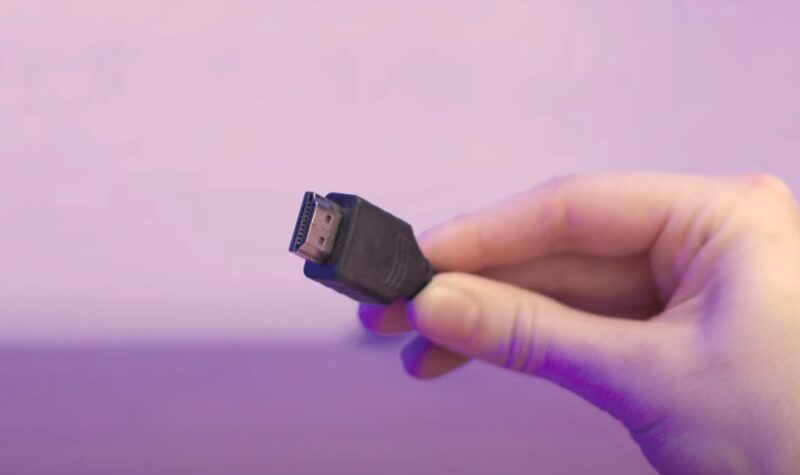
Once you’ve established that your devices can be connected, the next step is to select the right HDMI cable. There are different types of HDMI cables available in the market.
Standard HDMI cables are usually adequate for everyday tasks and can support resolutions up to 1080p. However, if you’re looking to connect to a 4K screen, you’ll need a high-speed HDMI cable capable of handling higher resolutions.
These cables are designed to support advanced features like 4K resolution, HDR, and expanded color spaces.
Update Your Laptop’s Graphics Drivers
An often-overlooked but critical step is ensuring that your laptop’s graphics drivers are up to date. Graphics drivers are software that controls how your laptop’s hardware interacts with its display and external monitors.
Outdated or corrupted drivers can lead to several issues when connecting to an external monitor, such as distorted display, incorrect resolutions, or even failure to detect the monitor.
You can update your drivers by visiting the laptop manufacturer’s website or using a driver update tool. This step can significantly improve the performance and compatibility of your external monitor connection.
Step-by-Step Guide
The first step is preparation. Ensure both your laptop and monitor are powered off. This is a critical safety measure and helps prevent any electrical issues or signal interference during the setup process.
Making the Connection
Next, you will connect the HDMI cable. HDMI, standing for High-Definition Multimedia Interface, is a widely used interface that transmits high-definition audio and video signals over a single cable.
Take your HDMI cable and insert one end into the HDMI port on your laptop. This port is typically labeled and can be found on the side or back of your laptop. Then, connect the other end of the cable to the HDMI port on your monitor.
If your laptop or monitor doesn’t have an HDMI port, you may need an appropriate adapter, such as USB-C to HDMI or Mini DisplayPort to HDMI, depending on your devices.
Powering Up
After making the physical connection, it’s time to power up your devices. Start by turning on the screen. This step is crucial because it allows the monitor to initialize and be ready to receive the signal from the laptop.
Once it is on and indicating that it’s searching for a signal, turn on your laptop. By powering on in this sequence, your laptop will recognize the monitor as it boots up, which helps in the automatic configuration of display settings.
Troubleshooting Tips
In some cases, the laptop may not immediately recognize the external device. If this happens, don’t worry. First, check to ensure that the HDMI cable is securely connected to both the laptop and the monitor.
If the connection is secure but the monitor still shows no signal, try a different HDMI port on the monitor, if available. Another common issue is with the display settings. If your monitor displays an image but it looks distorted or doesn’t fill the screen, you may need to adjust the display settings on your laptop.
This can usually be done by right-clicking on your desktop and selecting “Display settings” in Windows or “System Preferences” > “Displays” in macOS. Here, you can adjust the resolution and orientation to match your monitor’s specifications.
Configure Display Settings
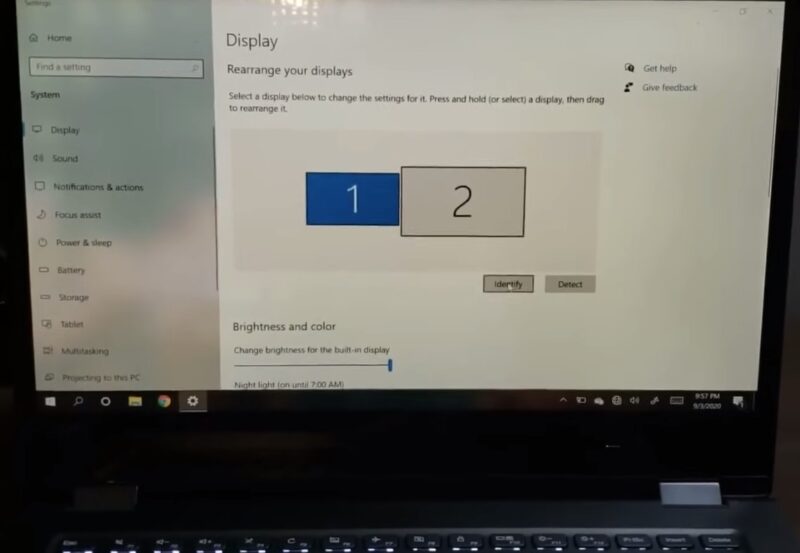
After successfully connecting your laptop by using HDMI, the next crucial step is configuring the display settings on your laptop. This process customizes the display to align with your specific needs and preferences, ensuring an optimal viewing experience.
Access Display Settings
To begin configuring, you need to access the display settings on your laptop. If you’re using a Windows laptop, simply right-click on the desktop and select “Display settings.”
This action will open the display settings menu where you can adjust various aspects of your screen. For Mac users, the process is slightly different. Click on the Apple menu, select “System Preferences,” and then choose “Displays.” This will bring you to a similar settings menu tailored for macOS.
Adjust Resolution and Orientation
Within the display settings menu, you have the option to adjust both the resolution and the orientation of your display. Adjusting the resolution is important to ensure that the display on the external monitor is clear and crisp.
You should ideally set the resolution to match your monitor’s native specifications for the best image quality. This is particularly important for tasks that require precision, such as graphic design or video editing.
The orientation setting is also significant, especially if you’re using a dual-monitor setup. You can arrange the displays to mirror the physical setup of your monitors.
For instance, if your external monitor is placed to the left of your laptop, you can arrange the displays in your settings to reflect this layout. This arrangement ensures a seamless transition of the cursor and windows from one screen to the other.
Choose the Right Display Mode
Finally, you need to decide how you want to utilize your external monitor. There are typically three modes you can choose from. The first is the ‘Duplicate’ mode, where your laptop’s screen is mirrored on the monitor.
This mode is useful for presentations or sharing content with others. The second option is the ‘Extend’ mode, which expands your desktop across both the laptop and the external monitor.
It is is excellent for multitasking and provides a larger digital workspace. The last option is to use the monitor as the primary display, with the laptop screen turned off. This mode is ideal if you prefer working on a larger screen or if you’re using a laptop with a smaller display.
Tips For Dealing With Potential Issues
When connecting your laptop to a monitor via HDMI, you might sometimes face issues. These problems can range from signal issues to audio problems. Understanding how to troubleshoot these common issues can help you quickly resolve them and ensure a seamless connection.
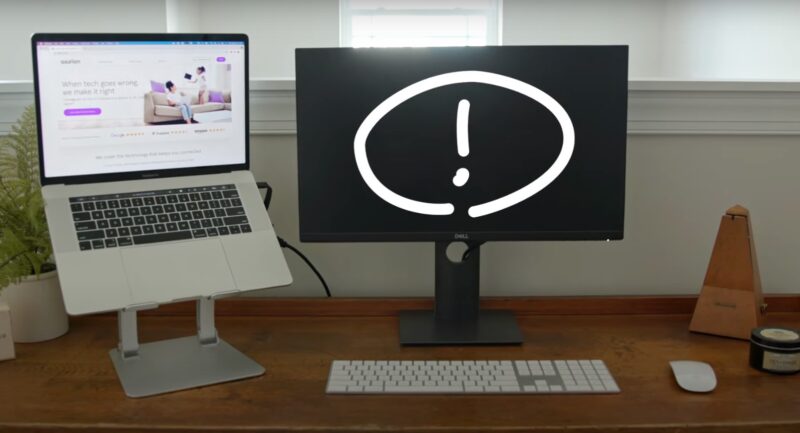
No Signal or Blank Screen
One common issue is encountering a ‘No Signal‘ message or a blank screen on the monitor. If this happens, the first step is to check the HDMI cable connections.
Ensure that the cable is securely plugged into both the laptop and the monitor. If the connections are secure but the problem persists, the next step is to check the input source on your monitor.
Monitors often have multiple input sources, and it’s crucial to select the one that corresponds to the port you’ve used to connect the HDMI cable.
Resolution and Aspect Ratio Issues
Another frequent issue is distortion in the display, such as incorrect resolution or aspect ratio. This can make the content on your monitor look stretched or pixelated. To fix this, access the display settings on your laptop and adjust the resolution.
You should set the resolution to match your monitor’s native resolution for the best display quality. The aspect ratio can also be adjusted in these settings, ensuring that the image on your screen accurately reflects the content without distortion.
Audio Problems
Sometimes, after connecting your laptop to a monitor via HDMI, you may not get any audio output from the monitor’s speakers. This issue is often related to the sound settings on your laptop.
To resolve this, go to the sound settings on your laptop and check the output device. Make sure that the HDMI-connected monitor is selected as the default audio output device. If it’s not listed, you may need to check the cable connection again or restart your laptop with the HDMI cable connected.
FAQs
How do I connect my laptop to a monitor and use both screens?
To connect your laptop to a monitor, you need to use a compatible display cable or adapter. Then, you need to adjust your display settings on your laptop to extend or duplicate your screen.
Why won’t my laptop display on my monitors?
There are several possible reasons why your laptop won’t display on your monitors, such as a faulty HDMI cable, an incorrect display mode, a wrong resolution setting, or a driver issue. You can try to troubleshoot these problems by checking your cable connections, changing your display options, updating or reinstalling your graphics driver, or restarting and reconnecting your devices.
Can I use my laptop as a monitor for my PC?
Yes, you can use your laptop as a monitor for your PC, but you need to have a special software or hardware that allows you to do so. For example, you can use a program like Spacedesk or Air Display to turn your laptop into a wireless second screen for your PC. Alternatively, you can use a device like KVM switch or HDMI capture card to connect your laptop and PC with a cable.
Why HDMI is not working?
HDMI is not working could be caused by various factors, such as a damaged or incompatible HDMI cable, a faulty HDMI port, a wrong input source, or a software glitch. You can try to fix this issue by testing your HDMI cable and port with another device, switching to a different input source, resetting your devices, or updating your firmware or drivers.
Do you only need an HDMI cable to connect monitor to a laptop?
Usually, you only need an HDMI cable to connect monitor to a laptop, as long as both devices have an HDMI port and support the same HDMI standard. However, in some cases, you may also need an adapter or a converter to connect monitor to a laptop, especially if they have different types of ports or support different video signals.
Last Words
Connecting a laptop to a monitor using HDMI is a simple yet effective way to enhance your computing experience. With this guide, you’re well-equipped to create a setup that meets your needs, whether for work, gaming, or entertainment. Remember to check compatibility, select the right cable, and adjust your settings for the best experience.