
If you have an Acer monitor, you may have encountered the annoying problem of getting a “No Signal” message on your screen. This means that your monitor is not receiving any data from your computer, and you can’t see anything on your display.
This can be frustrating, especially if you need to use your monitor for work, gaming, or entertainment. Fortunately, there are some possible solutions that you can try to fix this issue and get your monitor working again.
In this blog post, I will share with you 6 ways to fix Acer monitor no signal issue, based on the common causes and troubleshooting steps. Let’s get started!
1. Check the Monitor Input Settings
One of the simplest and most common reasons why your Acer monitor may display a “No Signal” message is that it is set to the wrong input source. For example, if you are using an HDMI cable to connect your monitor to your computer, but your monitor is set to receive signals from VGA, then you will not see anything on your screen.
To fix this, you need to adjust the monitor input settings and select the correct input source. You can do this by using the buttons on the side, back, or under the monitor screen.
Depending on the model of your monitor, the input settings may be located in different places in the monitor menu. You may need to navigate through the menu options to find the input settings.
Once you find the input settings, you need to select the input source that matches the cable and port that you are using to connect your monitor to your computer. For example, if you are using HDMI, then select HDMI as the input source. After selecting the correct input source, your monitor should display the signal from your computer.
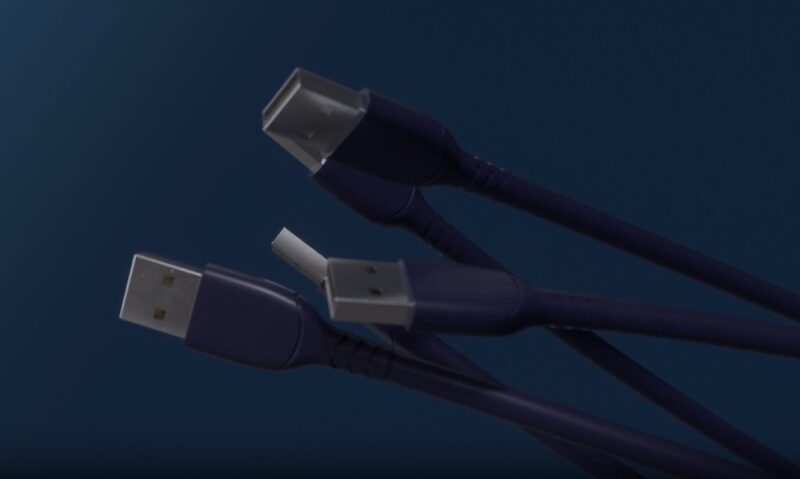
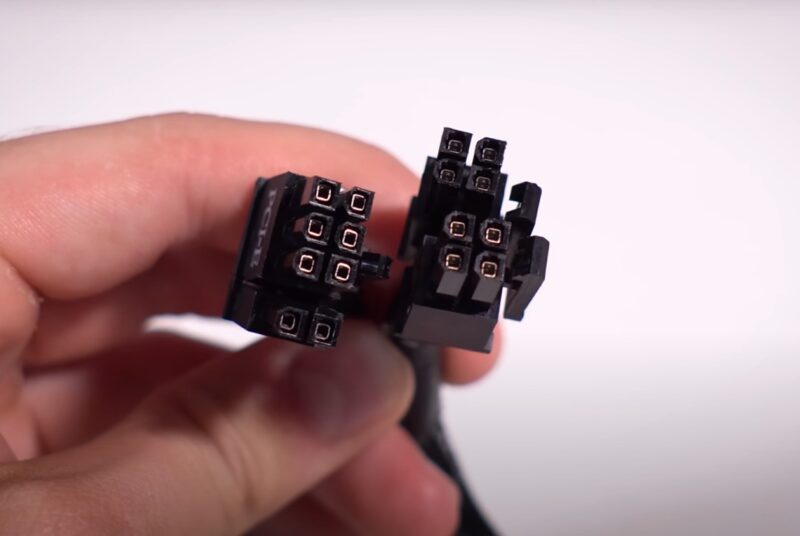
2. Check the Display Cable and Connections
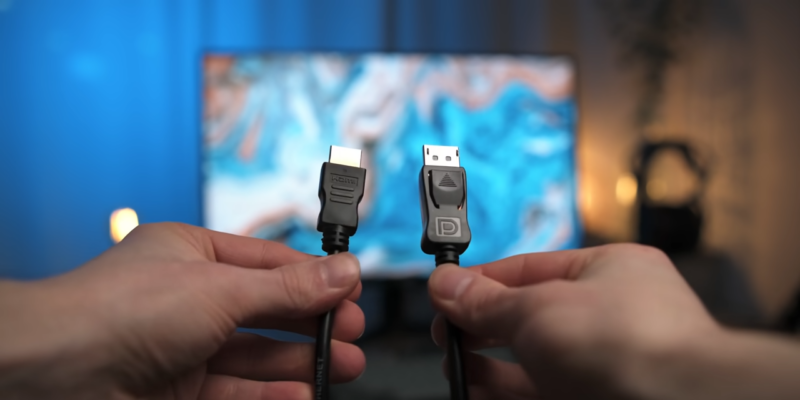
Another common reason why your Acer monitor may show a “No Signal” message is that there is a problem with the display cable or the connections. The display cable is the cable that connects your monitor to your computer, and it carries the video signals from your computer to your monitor.
If the cable is damaged, loose, or not plugged in properly, then your monitor will not receive any signal from your computer. To fix this, you need to check the display cable and the connections and make sure that they are in good condition and securely plugged in. You can follow these steps to do this:
- First, turn off your monitor and your computer and unplug them from the power source.
- Next, check the display cable and look for any signs of damage, such as cuts, frays, or bends. If the cable is damaged, you need to replace it with a new one.
- Then, check the ports on both ends of the cable and make sure that they are clean and dust-free. You can use a soft brush or a cotton swab to gently clean the ports if they are dirty.
- After that, plug the cable back into the ports and make sure that they are firmly inserted. You may need to push the cable until you hear a click or feel a snap.
- Finally, plug your monitor and your computer back into the power source and turn them on. Your monitor should display the signal from your computer.
3. Check the Graphics Card and Drivers
Another possible reason why your Acer monitor may display a “No Signal” message is that there is an issue with your graphics card or drivers. The graphics card is the component in your computer that processes the video signals and sends them to your monitor.
The drivers are the software that allows your computer and your monitor to communicate with each other. If your graphics card is faulty, not detected, or has outdated or corrupted drivers, then your monitor will not receive any signal from your computer.
To fix this, you need to check your graphics card and drivers and make sure that they are working properly and up to date. You can follow these steps to do this:
- First, open the Device Manager on your computer. You can do this by pressing the Windows key and the X key on your keyboard and selecting Device Manager from the menu.
- Next, expand the Display adapters category and look for your graphics card. If you see a yellow exclamation mark or a red cross next to your graphics card, it means that there is a problem with your graphics card or drivers.
- Then, right-click on your graphics card and select Update driver from the menu. Follow the instructions on the screen to search for and install the latest drivers for your graphics card. You may need to restart your computer after the update.
- Alternatively, you can also uninstall and reinstall your graphics card and drivers. To do this, right-click on your graphics card and select Uninstall device from the menu. Then, restart your computer and wait for Windows to automatically detect and install your graphics card and drivers.
- Finally, check your monitor and see if it displays the signal from your computer.
4. Check the RAM Modules
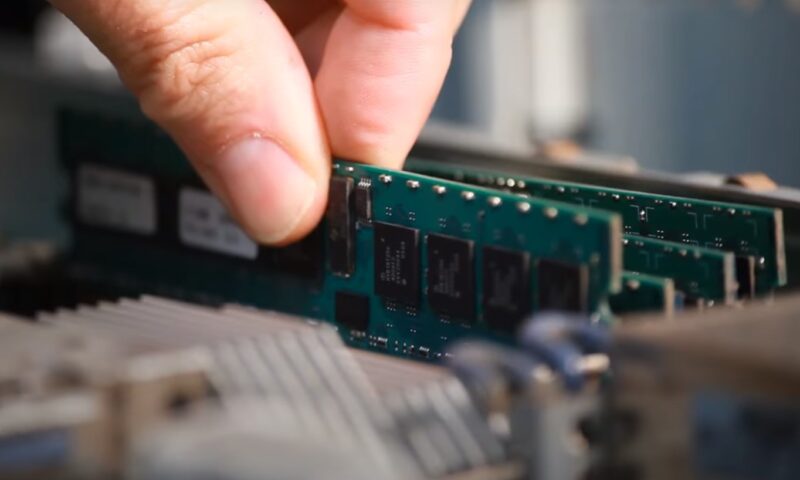
Another potential reason why your Acer monitor may show a “No Signal” message is that there is a problem with your RAM modules. The RAM modules are the components in your computer that store the temporary data and information that your computer needs to run.
If your RAM modules are faulty, loose, or not compatible, then your computer may not boot up properly and your monitor may not receive any signal from your computer. To fix this, you need to check your RAM modules and make sure that they are in good condition and securely installed. You can follow these steps to do this:
- First, turn off your computer and unplug it from the power source.
- Next, open the case of your computer and locate the RAM modules. They are usually long and thin and inserted into slots on the motherboard.
- Then, gently remove the RAM modules from the slots by pushing the clips on the sides and pulling them out.
- After that, check the RAM modules and look for any signs of damage, such as cracks, burns, or corrosion. If the RAM modules are damaged, you need to replace them with new ones.
- Then, check the slots and make sure that they are clean and dust-free. You can use a soft brush or a cotton swab to gently clean the slots if they are dirty.
- After that, reinstall the RAM modules into the slots and make sure that they are firmly inserted. You may need to push the RAM modules until you hear a click or feel a snap.
- Finally, close the case of your computer and plug it back into the power source and turn it on. Your monitor should display the signal from your computer.
5. Check the Power Supply and the Motherboard
Another possible cause of this issue is that there is a problem with the power supply or the motherboard. The power supply is the component in your computer that provides the electricity to all the other components.
The motherboard is the component in your computer that connects all the other components and allows them to communicate with each other. If the power supply is faulty, not connected, or not providing enough power, or if the motherboard is damaged, then your computer may not boot up properly and your monitor may not receive any signal from your computer.
To fix this, you need to check the power supply and the motherboard and make sure that they are working properly and connected. You can follow these steps to do this:
- First, turn off your computer and unplug it from the power source.
- Next, open the case of your computer and locate the power supply and the motherboard. The power supply is usually a large box with a fan and several cables coming out of it. The motherboard is usually a large board with several slots, ports, and connectors on it.
- Then, check the power supply and make sure that it is not damaged, overheated, or making any unusual noises. If the power supply is damaged, you need to replace it with a new one.
- Then, check the cables from the power supply and make sure that they are securely plugged into the motherboard and the other components. You may need to push the cables until you hear a click or feel a snap.
- After that, check the motherboard and make sure that it is not damaged, burned, or corroded. If the motherboard is damaged, you need to replace it with a new one.
- Finally, close the case of your computer, plug it back into the power source, and turn it on. Your monitor should display the signal from your computer.
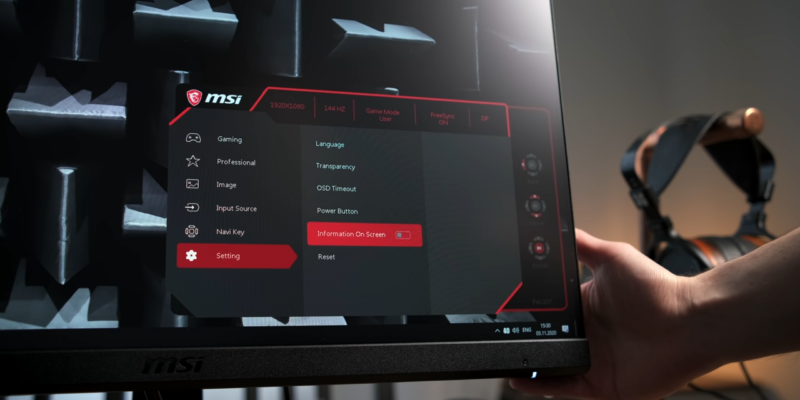
6. Factory Reset Your Monitor
 +
+
The last resort that you can try to fix the “No Signal” message on your Acer monitor is to factory reset your monitor. This means that you will restore your monitor to its original settings and erase any changes that you have made.
This may help to solve any software or configuration issues that may be causing the problem. However, before you do this, you should be aware that this will also erase any personal settings that you have made on your monitor, such as brightness, contrast, color, etc.
You may need to adjust these settings again after the reset. To factory reset your monitor, you need to follow the instructions in your monitor’s manual or on the Acer website.
The exact steps may vary depending on the model of your monitor, but they usually involve using the buttons on the monitor to access the menu and selecting the reset option. After resetting your monitor, you should check if it displays the signal from your computer.
FAQs
How do I know which input source to select on my monitor?
You need to select the input source that matches the cable and port that you are using to connect your monitor to your computer. For example, if you are using HDMI, then select HDMI as the input source.
How do I update my graphics card drivers?
You can update your graphics card drivers by using the Device Manager on your computer. You need to right-click on your graphics card and select Update driver from the menu. Follow the instructions on the screen to search for and install the latest drivers for your graphics card.
How do I remove and reinstall my RAM modules?
You need to turn off your computer and unplug it from the power source. Then, open the case of your computer and locate the RAM modules. They are usually long and thin and inserted into slots on the motherboard.
You need to gently remove the RAM modules from the slots by pushing the clips on the sides and pulling them out. Then, reinstall the RAM modules into the slots and make sure that they are firmly inserted.
How do I check if my power supply is working properly?
You need to turn off your computer and unplug it from the power source. Then, open the case of your computer and locate the power supply. It is usually a large box with a fan and several cables coming out of it.
You need to check the power supply and make sure that it is not damaged, overheated, or making any unusual noises. If the power supply is damaged, you need to replace it with a new one.
How do I factory reset my monitor?
You need to follow the instructions in your monitor’s manual or on the Acer website. The exact steps may vary depending on the model of your monitor, but they usually involve using the buttons on the monitor to access the menu and selecting the reset option.
What should I do if none of the above methods work?
If none of the above methods work, you may need to contact Acer customer support or a professional technician for further assistance. There may be a more serious problem with your monitor or your computer that requires expert help.
Final Words
By following these methods, you should be able to solve the problem and get your monitor working again. However, if none of these methods work, you may need to contact Acer customer support or a professional technician for further assistance.
I hope this blog post was helpful and informative for you. Thank you for reading! Our blog covers various issues regarding technology, and our recent guide on how to run dual monitors with one HDMI port, may be handy for you, so make sure to check it out.